The Raspberry Pi doesn’t have a little coin-battery-powered ‘Real Time Clock’ (RTC) module, which keeps time even when the power is off, or the battery removed.
To keep costs low and the size small, an RTC is not included with the Raspberry Pi. If your Raspberry Pi is connected to the Internet via Ethernet or WiFi, the time/date will be automatically updated from the global ntp (nework time protocol) servers.
For stand-alone projects with no network connection, you will not be able to keep the time when the power goes out.
In this project we will show you how to add a RTC Click shield from Mikroelektronika, without the use of iron solder or breadboard.
I have used Click Shield for Raspberry PI and a RTC Click Shield from Mikroelektronika
These boards are just for example ( they don't need any iron solder to connect ) , since this tutorial could be considered valid for any other boards using PCF8583 with Raspberry PI.
These boards are just for example ( they don't need any iron solder to connect ) , since this tutorial could be considered valid for any other boards using PCF8583 with Raspberry PI.
We just need to insert the two Click board as per below images.
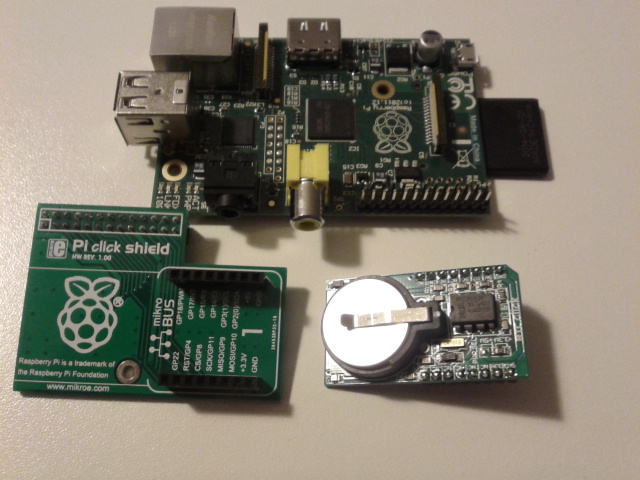
A Raspberry PI with Pi Click shield ( on the left ) and a RTC Click shield ( on the right )
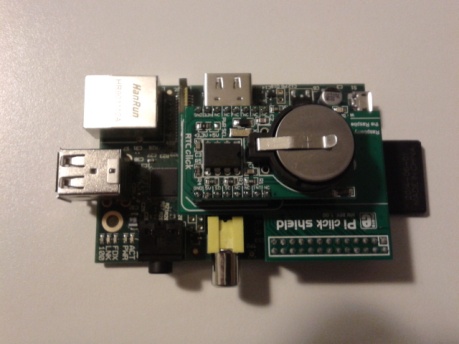
The 3 boards ( Raspberry PI ( on the bottom ) – Pi click Shield ( on the middle ) – RC Click shield ( on the top )
A Raspberry PI with Pi Click shield ( on the left ) and a RTC Click shield ( on the right )

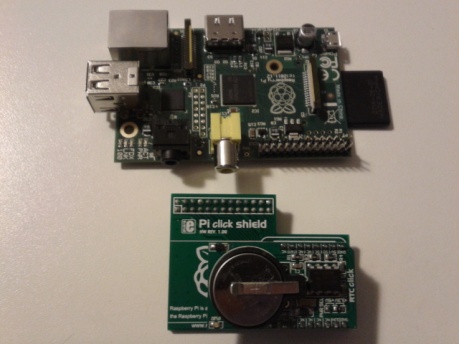
The RTC Click shield inserted on the PI Click shield

The 3 boards ( Raspberry PI ( on the bottom ) – Pi click Shield ( on the middle ) – RC Click shield ( on the top )
Now that we have the module correctly inserted we can set up the module, configuring the I2C :
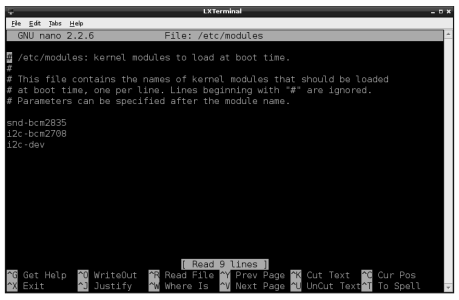
If you are using Raspbian, you will need to open LXTerminal and enter the following command:
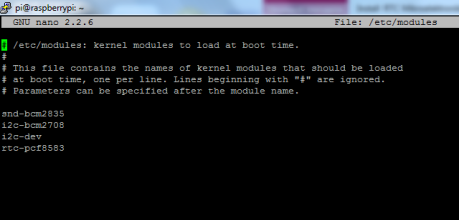
sudo nano /etc/modules
and add these two lines to the end of the file
i2c-bcm2708
i2c-dev
i2c-dev

After editing the file, you will need to reboot for the changes to take effect.
The I2C bus allows multiple devices to be connected to your Raspberry Pi, each with a unique address, that can often be set by changing jumper settings on the module. It is very useful to be able to see which devices are connected to your Pi as a way of making sure everything is working.
To do this, it is worth running the following commands in the Terminal to install the i2c-tools utility.
sudo apt-get install python-smbus
sudo apt-get install i2c-tool
sudo apt-get install i2c-tool
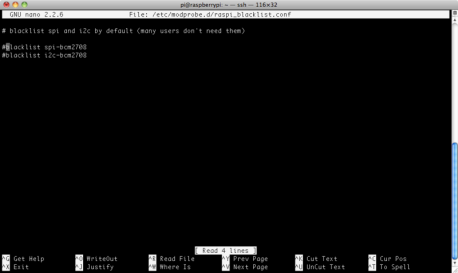
Depending on your distribution, you may also have a file called /etc/modprobe.d/raspi-blacklist.conf If you do not have this file then there is nothing to do, however, if you do have this file, you need to edit it and comment out the lines below:
blacklist spi-bcm2708
blacklist i2c-bcm2708
.. by putting a # in front of them. Open an editor on the file by typing
blacklist i2c-bcm2708
.. by putting a # in front of them. Open an editor on the file by typing
sudo nano /etc/modprobe.d/raspi-blacklist.conf
.. then edit the file so that it appears as below, and then save and exit the file using CTRL-x and Y.

Once this is all done, reboot!
sudo reboot
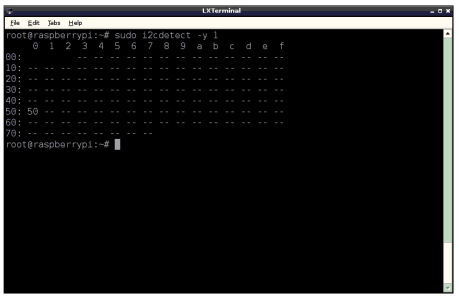
Now when you log in you can type the following command to see all the connected devices (if you are running a 512MB Raspberry Pi Model B)
sudo i2cdetect -y 1
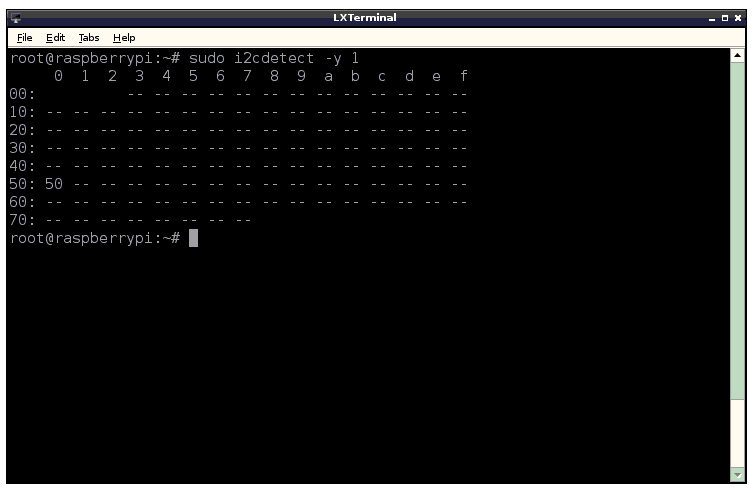
This shows that one I2C address is in use – 0x50.
Note that if you are using one of the very first Raspberry Pis (a 256MB Raspberry Pi Model B) then you will need to change the command to:
sudo i2cdetect -y 0
The Raspberry Pi designers swapped over I2C ports between board releases. Just remember: 512M Pi’s use i2c port 1, 256M ones use i2c port
Now we will set the RTC
Now that we have the module wired up and verified that you can see the module with i2cdetect, we can set up the module. First, load up the RTC module by running
- sudo modprobe rtc-pcf8583
Then, as root (type in sudo bash) run
- echo pcf8583 0x50 > /sys/class/i2c-adapter/i2c-0/new_device (if you have a rev 1 Pi)
- echo pcf8583 0x50 > /sys/class/i2c-adapter/i2c-1/new_device (if you have a rev 2 Pi)
You can then type in exit to drop out of the root shell.
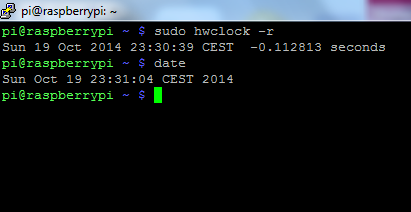
Then check the time with
sudo hwclock -r
which will read the time from the PCF8583 module. If this is the first time the module has been used, it will report back Jan 1 2000, and you’ll need to set the time. Can also happen that it will report an invalid data.
Then check the time with
sudo hwclock -r
which will read the time from the PCF8583 module. If this is the first time the module has been used, it will report back Jan 1 2000, and you’ll need to set the time. Can also happen that it will report an invalid data.

First you’ll need to get the right time set on the Pi, the easiest way is to connect it up to Ethernet or Wifi – it will automatically set the time from the network. Once the time is correct (check with the date command), run
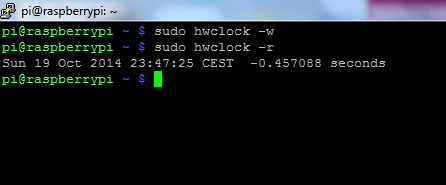
sudo hwclock -w to write the system time to the RTC.
You can then verify it with sudo hwclock -r.
sudo hwclock -w to write the system time to the RTC.
You can then verify it with sudo hwclock -r.

Next, you’ll want to add the RTC kernel module to the /etc/modules list, so its loaded when the machine boots. Run sudo nano /etc/modules and add rtc-pcf8583 at the end of the file.

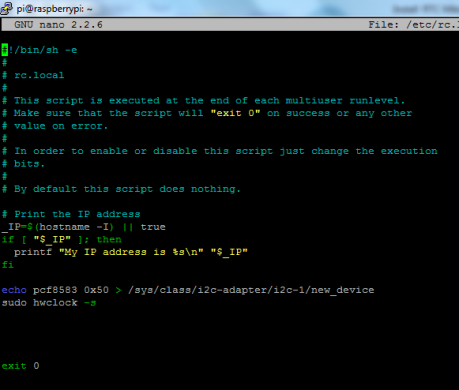
Then you’ll want to create the PCF8583 device creation at boot, edit /etc/rc.local by running
- sudo nano /etc/rc.local
and add:
echo pcf8583 0x50 > /sys/class/i2c-adapter/i2c-0/new_device (for v1 raspberry pi)
echo pcf8583 0x50 > /sys/class/i2c-adapter/i2c-1/new_device (v2 raspberry pi)
sudo hwclock -s (both versions)
echo pcf8583 0x50 > /sys/class/i2c-adapter/i2c-1/new_device (v2 raspberry pi)
sudo hwclock -s (both versions)
before exit 0 (we forgot the hwclock -s part in the screenshot below)

That’s all! Next time you boot the time & date will automatically be synced from the RTC Click shield module